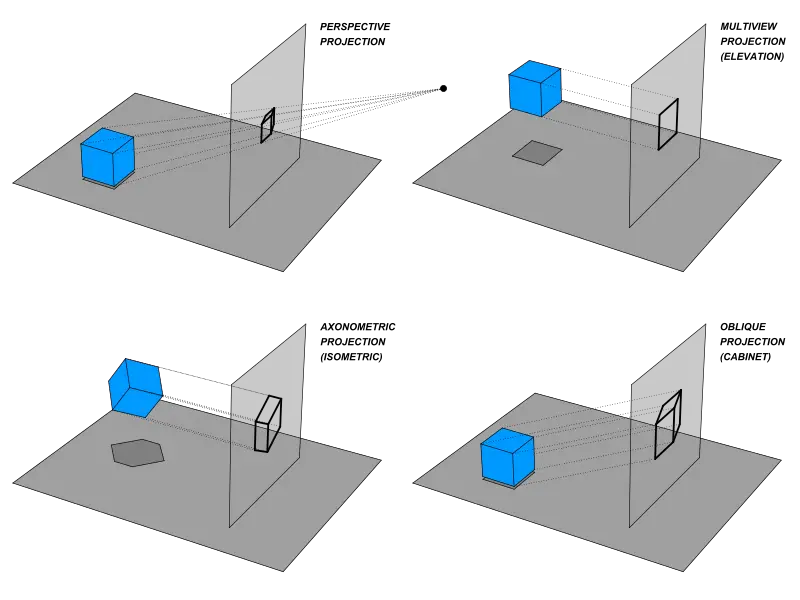
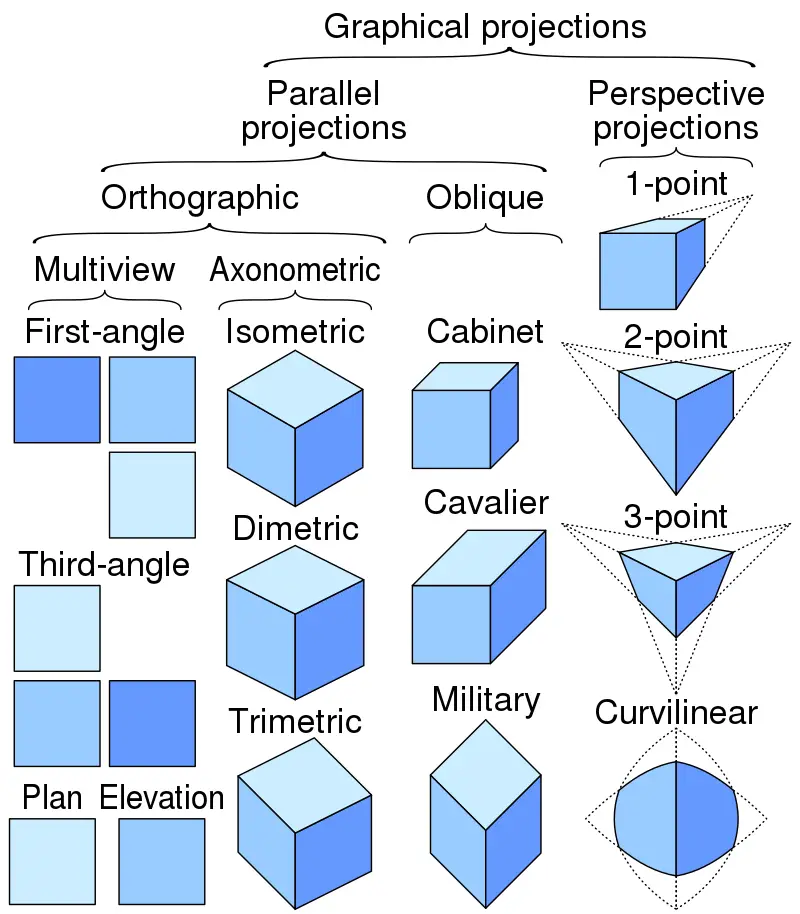
Orthographic Projection or Orthogonal projection is a process of representing three-dimensional objects in two dimensions. It’s a kind of parallel projection where projection lines are orthogonal to projection planes. Let’s learn in this article more about Orthographic Projection.
What Is Orthographic Projection
Orthographic projection is the latest standard of technical drawing in which different views are projected into different reference planes observing perpendicular to the respective reference plane.
To understand Orthographic Projection, think of yourself standing in a mirror room. There are mirrors all around you and different mirrors are showing a different side of you. Orthographic Projection work in the same way and that mirror are termed as reference planes which are just imaginary object.

Types of Reference plane
Reference planes are imaginary surfaces on which different view of an object is projected. The shape of the object is projected as the actual size on those reference planes. There are mainly three types of reference planes as shown below.
- Horizontal Plane
- Vertical Plane
- Profile Plane
What Are Principal Planes
Horizontal and vertical planes are placed in perpendicular and called principal planes.
What Is Auxiliary Plane
Apart from horizontal, vertical and profile plane, if any other planes are placed at any other position is called auxiliary plane.
What Is Dihedral And Trihedral Angle
When reference planes are placed in such a way that it creates four quadrants, then the angle between those planes is called the dihedral angle.
When reference planes are placed in such a way that it creates eight quadrants, then the angle between those planes is called the trihedral angle.
Types Of Orthographic Projection Views
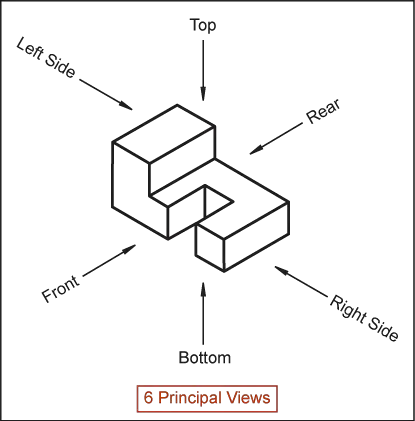
There are six types of orthographic projection views used in technical drawings. But there are mainly three projection views, the other three are just the flip side of those three views.
- Front View
- Back View
- Top View
- Bottom View
- Right View
- Left View

Front View
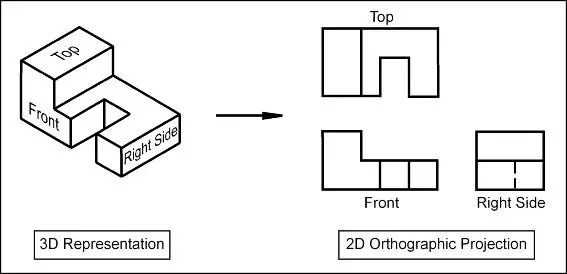
In front view views are placed in frontal planes and shows the length and height of an object
Top View
Top views are created on the top imaginary planes and shows the length and width of an object
Side View
Side views are created on side imaginary planes and shows width and depth of an object.

Types Of Orthographic Projection
There are four types of projection but out of that only first angle projection and third angle projections are used.
- First angle projection
- Second angle projection
- Third angle projection
- Fourth angle projection
First Angle Projection
In first angle projection, Orthographic Projection views are created keeping the object in the first quadrant. First angle projection is mainly used in India and other Asian countries.
In first angle projection, top view is placed above the front view and side view is next to the front view.
Third Angle Projection
In the third angle projection, Orthographic Projection views are created keeping the object in the third quadrant. Third angle projection is mainly used in the United States.
In third angle projection, the top view is placed below the front view and side view is next to the front view.

Rules Of Orthographic Projection
- The front view should show the length and height of objects
- The top view should show the length and depth of objects
- Side view should show the height and depth of objects
- The front view and top view should be always over/under each other
- Side view always forms beside the front view.
- The horizontal plane is rotated clockwise to show the 2D views in the drawing.
Conclusion
Orthographic Projection is the key to creating two-dimensional drawings. It’s the vocabulary of how we read the drawing. I hope I could able to offer a glimpse of what Orthographic Projection actually is. If you have any questions, do write in the comment section and I will be happy to answer.


